Email Addon for Ninja Forms
This guide explains the Email Addon for Ninja Forms plugin. Please review it before installation. For support, contact [email protected].
Subscribe to our newsletter and enjoy up to 15% OFF on every product and exclusive offers.
This guide explains the Email Addon for Ninja Forms plugin. Please review it before installation. For support, contact [email protected].

The Email Addon for Ninja Forms is a powerful email configuration extension built to enhance how notification emails are sent from Ninja Forms. It enables you to create professional, well-structured emails for both admin and users, using a collection of pre-developed, visually appealing email templates that go beyond basic plain-text messages.
The Addon includes a collection of ready-to-use email templates that you can select and customize without writing any code. You can modify the email design, colors, typography, header, footer, and other elements to match your website's branding, helping you provide a consistent and professional experience for your users.
The plugin also supports the use of multiple pre-designed templates, allowing you to perform A/B testing on your email communications. This helps you analyze user engagement, compare different email layouts or messages, and continuously optimize email performance to improve response and conversion rates.
Before installing Email Addon for Ninja Forms, please ensure the following requirements are met:
Email Delivery Pro-Tip: For reliable email delivery and to ensure notification updates never land in spam folders, we highly recommend routing your WordPress transactional mail through an SMTP plugin paired with a dedicated email service provider.
It is always recommended to keep your WordPress, PHP, and MySQL/MariaDB versions up to date for security and performance reasons.
Before using the Email Addon for Ninja Forms plugin, ensure that the Ninja Forms plugin is already installed and activated on your WordPress website. Email Addon for Ninja Forms works as an extension of the Ninja Forms plugin and cannot function independently.
To purchase the Email Addon for Ninja Forms plugin, visit the KrishaStore website. After completing your purchase, you'll receive a ZIP file that you can use to install the plugin.
Once the admin enters a valid license key, the user can access and use all the features of the Email Addon for Ninja Forms plugin.
When you purchase the Email Addon for Ninja Forms plugin from the KrishaStore website, your license key is available in the My Account section on the front-end dashboard. This license key is required to activate the plugin within your WordPress admin panel.
The subscription remains active until the end of the current billing cycle, even if you choose to cancel it.
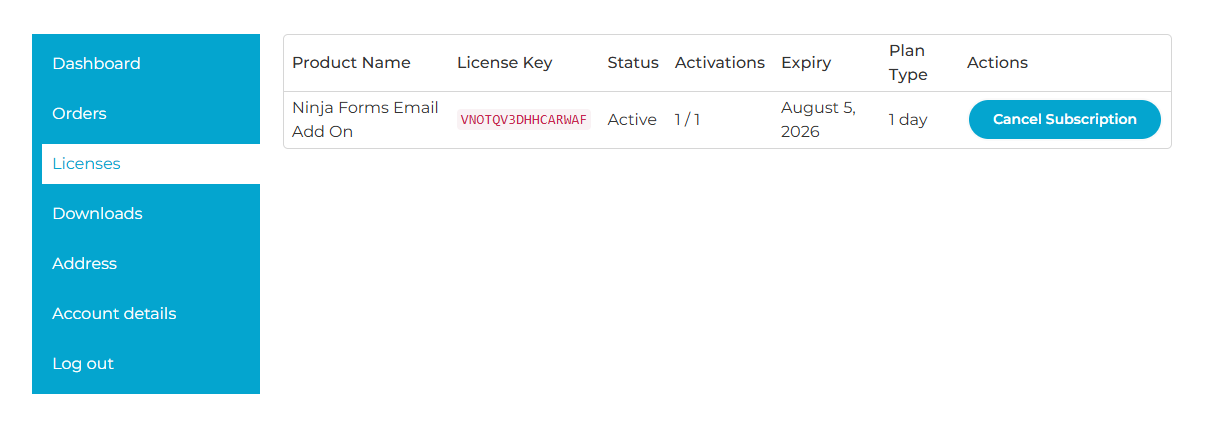
Follow these steps to activate your Email Addon for Ninja Forms license from the WordPress admin panel:
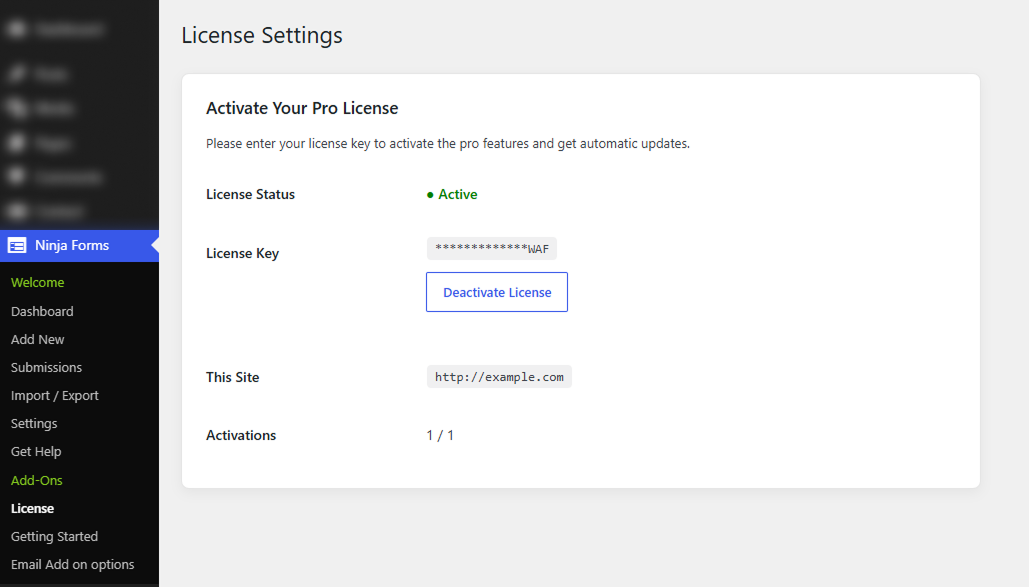
Step 1: Copy License Key
Step 2: Open License Settings in WordPress
Step 3: Enter License Key
Step 4: Verify Activation
Once activated, you will see:
This process ensures that your Email Addon for Ninja Forms plugin is fully activated and ready to use with all premium features.
After activating the Email Addon for Ninja Forms, you can assign professional email templates to each Ninja Forms form.
To access the email templates:
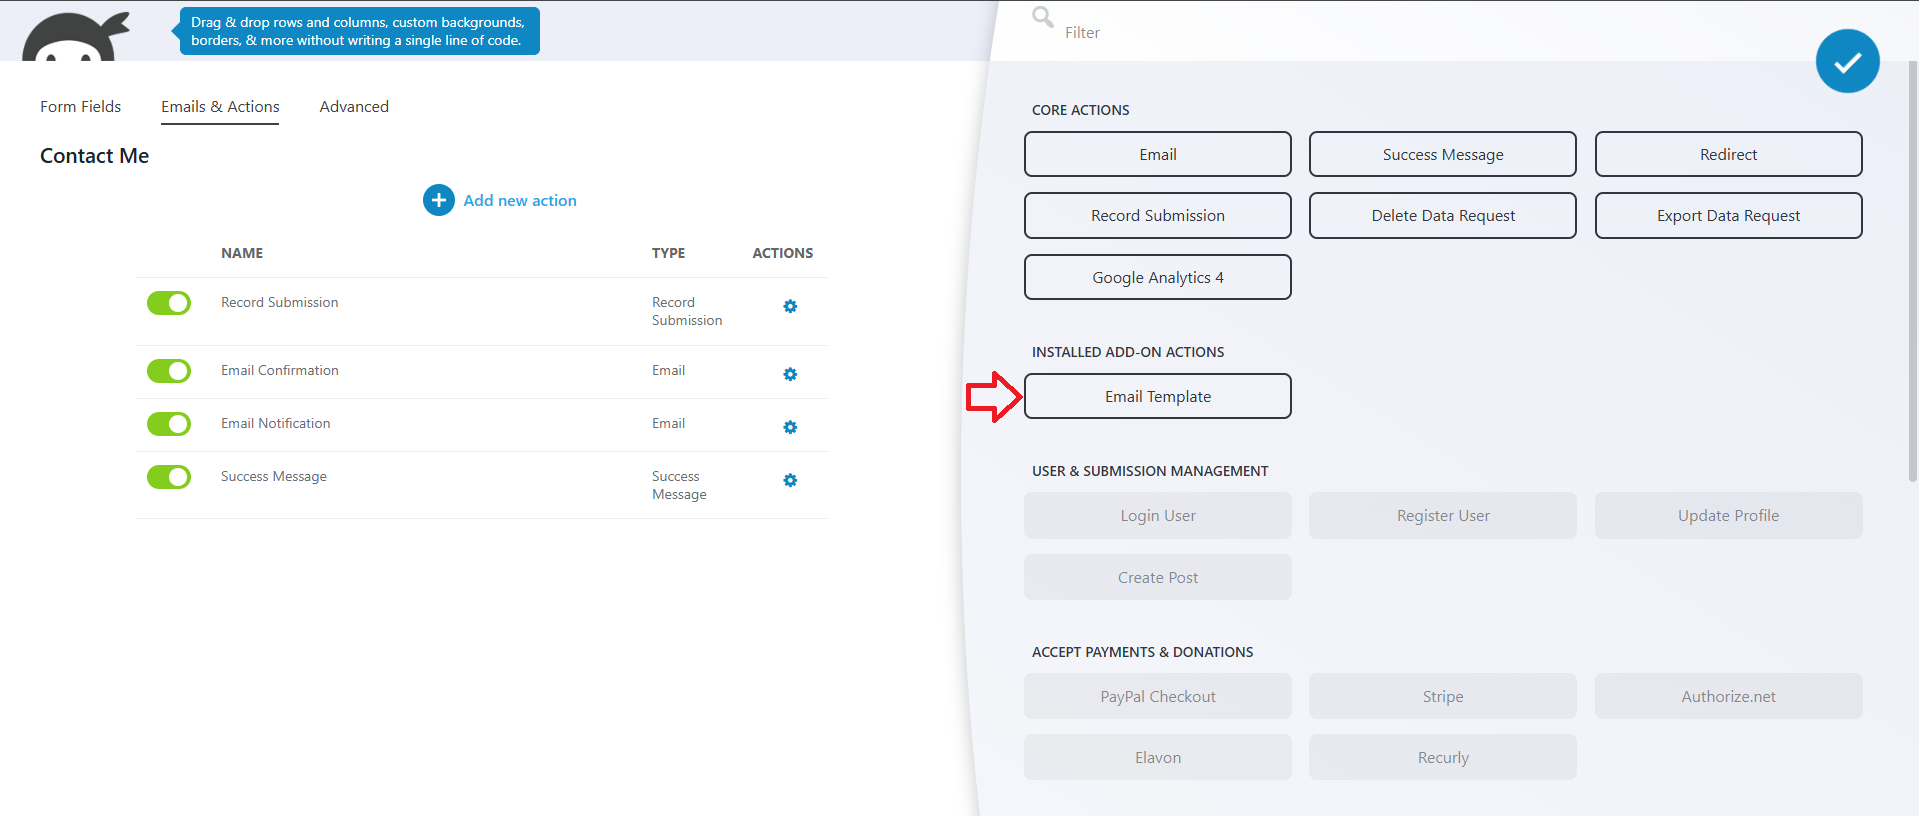
From this panel, you can choose separate pre-designed email templates for:
Once you select a template and save the form, the chosen design will automatically be used for future email notifications.
After creating your form, copy the generated shortcode and paste it into any page, post, or widget where you want the form to appear. For example, you can create a Contact Us page and insert the Ninja Forms shortcode. When visitors submit the form:
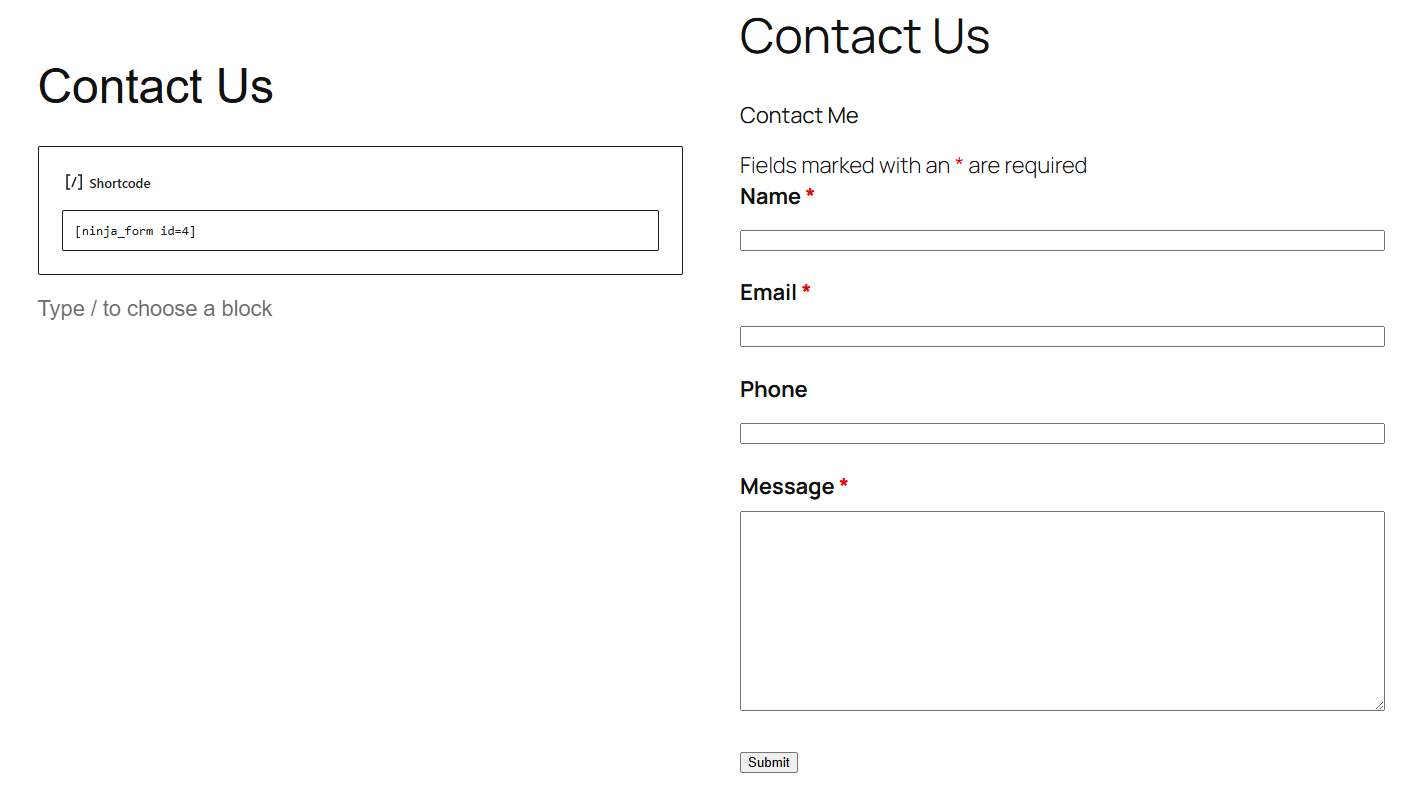
Both emails are automatically generated using the templates you have selected in the Email Template panel.
The Email Template panel allows you to manage the email design used by each Ninja Forms form. Each form can have two different email templates:
The plugin includes a collection of ready-to-use templates. Simply select the template you prefer, then customize the email content using the standard Ninja Forms mail settings (such as the Message Body, subject, sender, and recipient). After saving the form, all future emails will use the selected template.
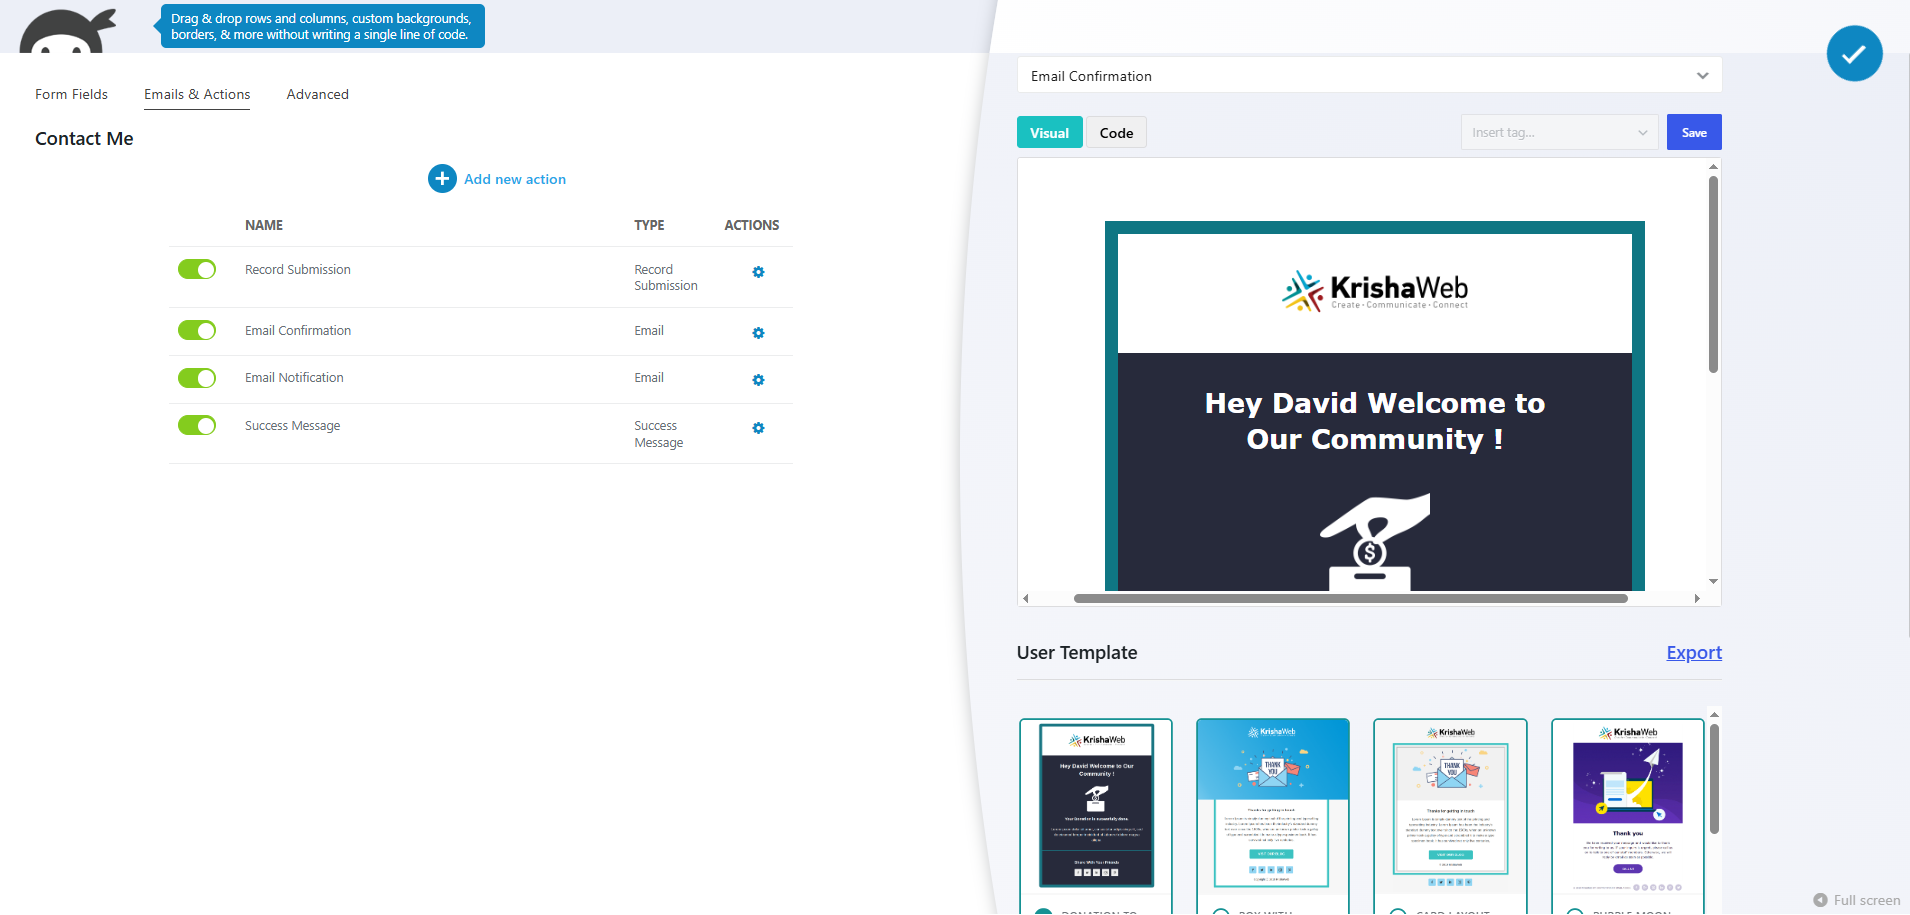
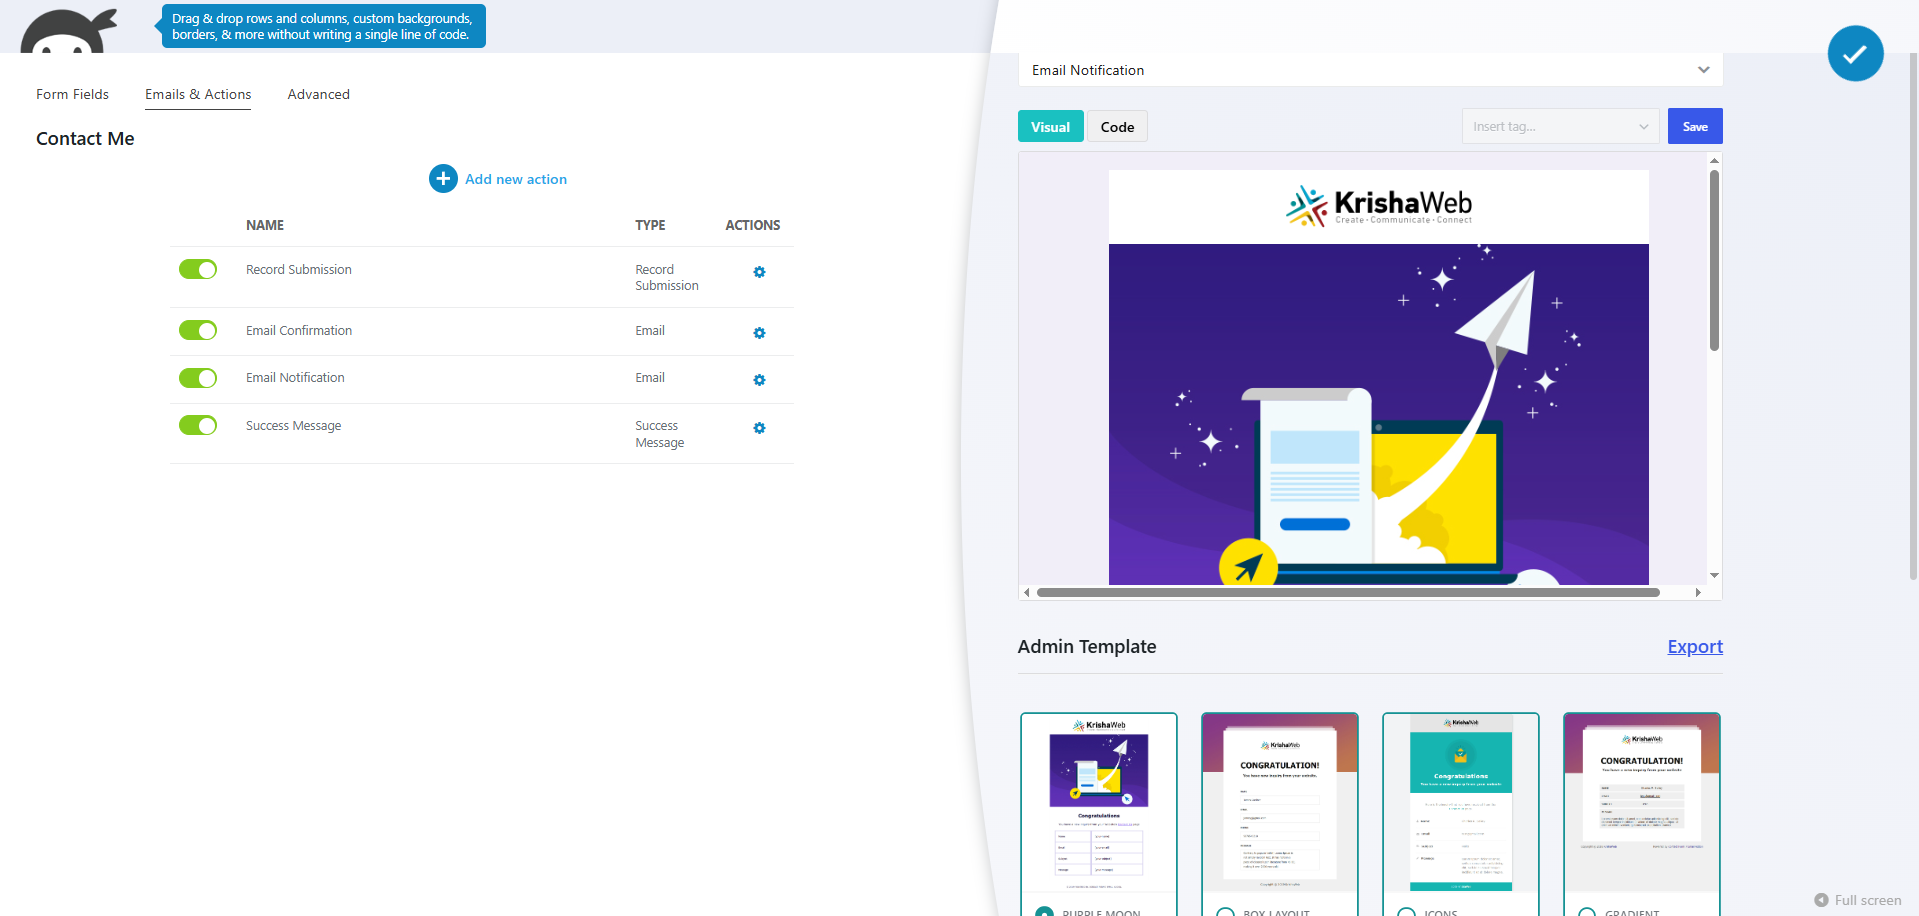
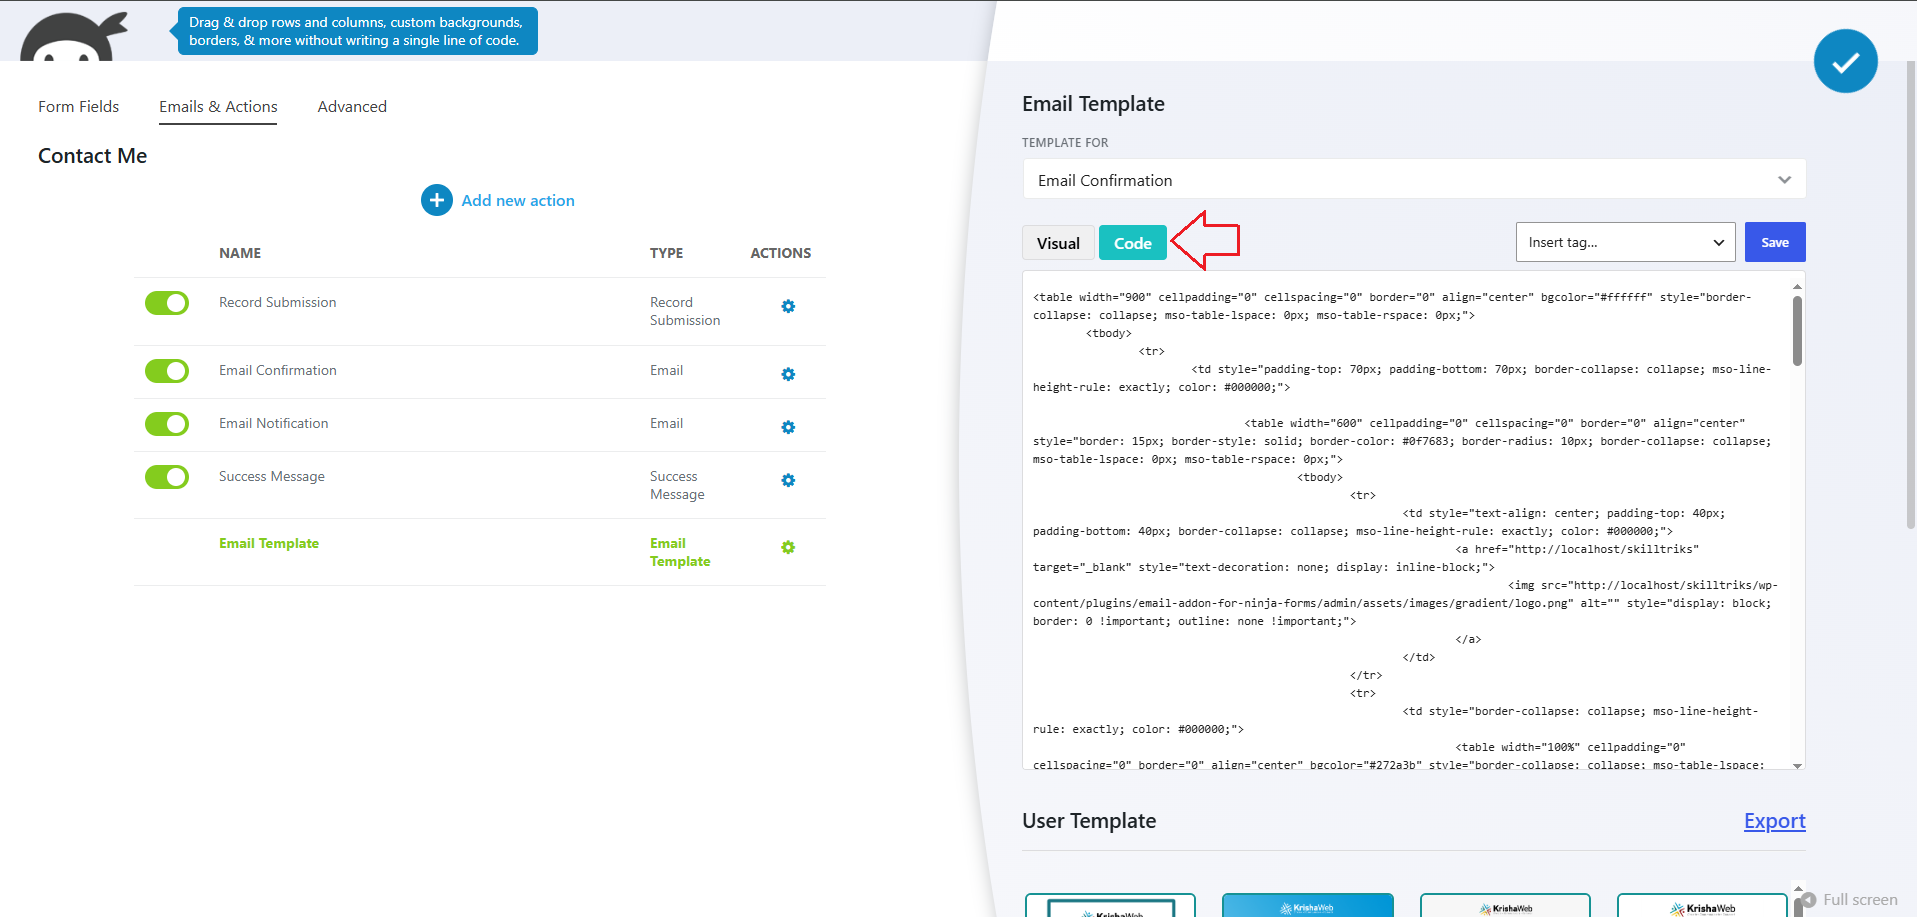
The Message Body section contains the email content that will be sent when a visitor submits your Ninja Forms form. When you select an email template from the Email Template action, the plugin automatically inserts the template's HTML code into this field. This HTML defines the complete layout of the email, including the header, content area, footer, styling, and other design elements.
You can edit this HTML at any time to customize the appearance and content of your email. For example, you can modify the text, change colors, update fonts, replace images, add your company logo, adjust spacing, or include additional sections to better match your website's branding. The message body also supports standard Ninja Forms merge tags and the plugin's Special Mail Tags, allowing you to display dynamic information such as the submitter's name, email address, form fields, website details, and submission information.
Any changes you make to the Message Body will be used the next time an email is sent from the form.
The Special Mail Tags feature allows you to insert dynamic information into your Ninja Forms email templates. In addition to individual form fields, you can use special tags to automatically display submission details, date and time information, and WordPress site information in the email.
To view the available tags:
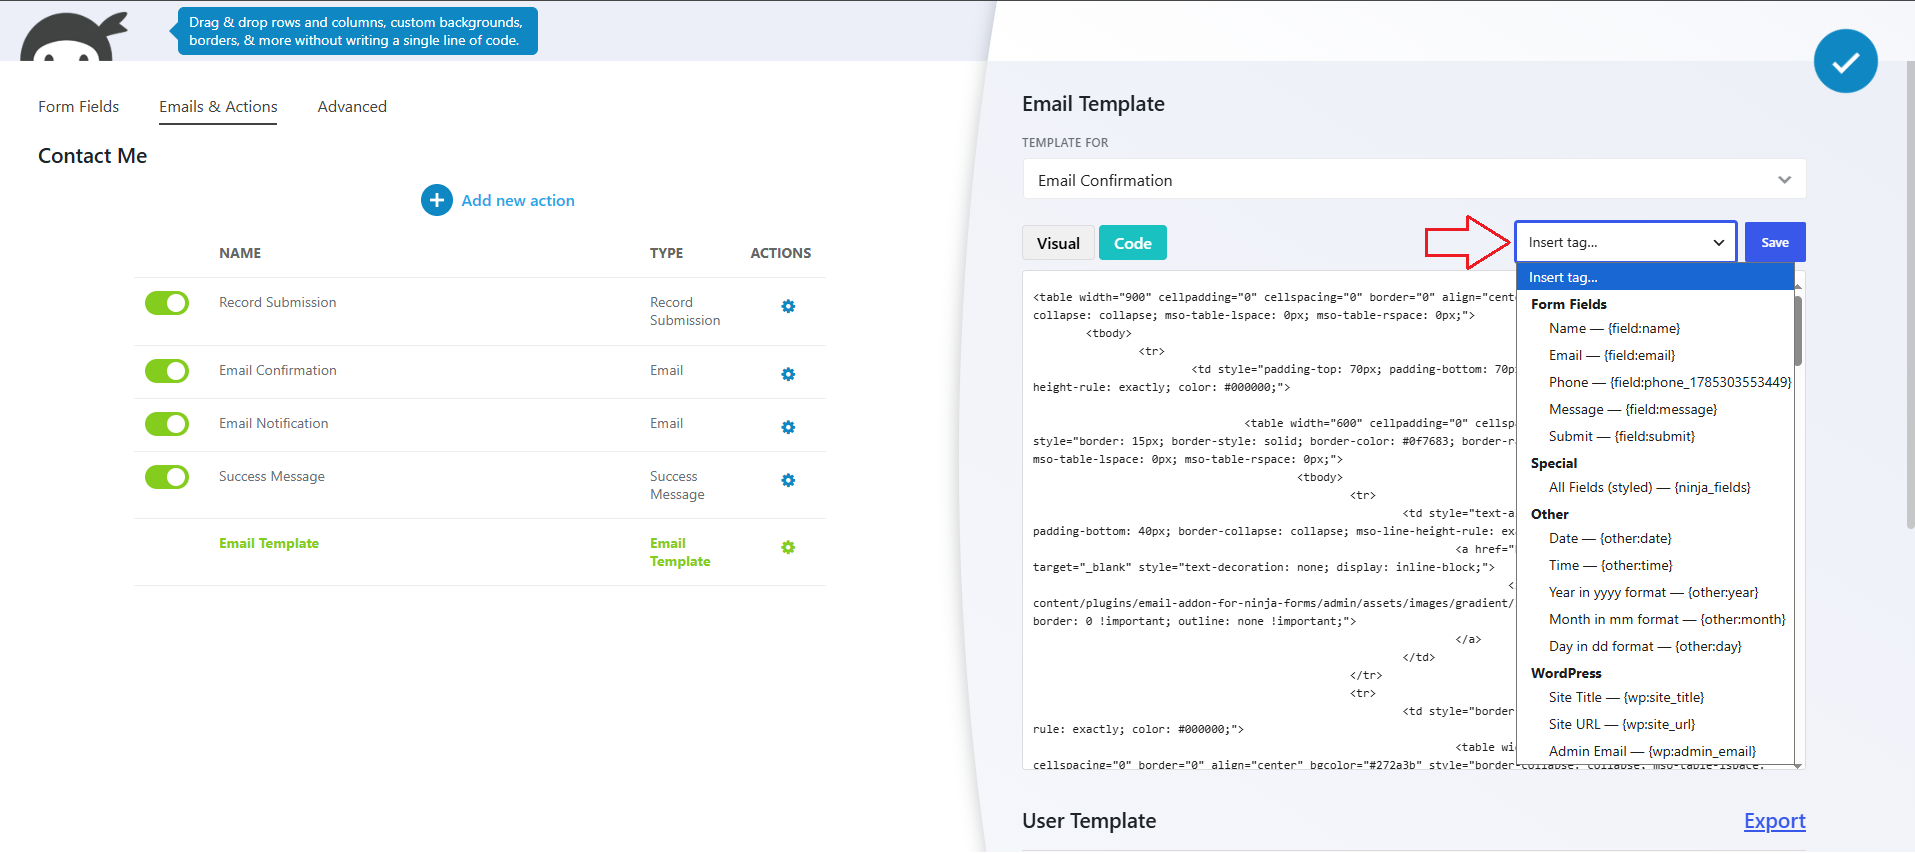
The available tags are organized into categories such as:
To insert a tag, place your cursor at the desired location in the email template and select the required option from the Insert tag dropdown. The corresponding Ninja Forms merge tag will be inserted into the template.
When the email is generated, Ninja Forms automatically replaces each tag with its corresponding value. This allows you to create personalized and informative user confirmation and administrator notification emails without manually entering submission or website information.
After adding or modifying tags, click Save to save the Email Template, and then save the form to apply your changes.
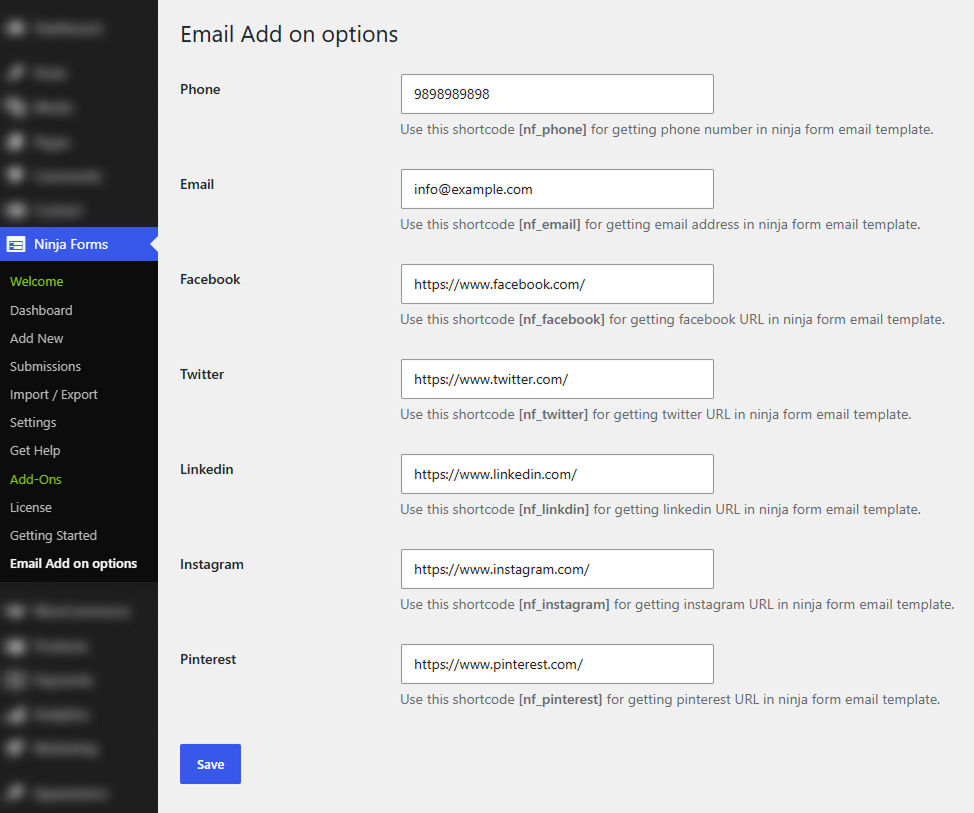
After installing the plugin, you can manage the global email settings by going to Ninja Forms → Email Add-on Options in the WordPress dashboard. Here, you can add your contact details and social media links, which will automatically appear in the selected email templates. This helps keep all user and admin emails consistent, professional, and up to date.
After entering the required information, click Save to apply the changes to your email templates.
If you've followed the steps outlined in this guide and still need assistance, please don't hesitate to contact our support team. E-mail us at [email protected] — we're here to help!