Email Addon for Contact Form 7
This guide explains the Email Addon for Contact Form 7 plugin. Please review it before installation. For support, contact [email protected].
Subscribe to our newsletter and enjoy up to 15% OFF on every product and exclusive offers.
This guide explains the Email Addon for Contact Form 7 plugin. Please review it before installation. For support, contact [email protected].

The Email Addon for Contact Form 7 is an extension that enhances the default email notifications generated by Contact Form 7 after a form is submitted. Instead of using the standard plain-text email layout, this Addon allows you to create professional, well-designed HTML email notifications for both the website administrator and the visitor who submits the form.
The Addon includes a collection of ready-to-use email templates that you can select and customize without writing any code. You can modify the email design, colors, typography, header, footer, and other elements to match your website's branding, helping you provide a consistent and professional experience for your users.
Before installing Email Addon for Contact Form 7, please ensure the following requirements are met:
Email Delivery Pro-Tip: For reliable email delivery and to ensure notification updates never land in spam folders, we highly recommend routing your WordPress transactional mail through an SMTP plugin paired with a dedicated email service provider.
If you are using Email Addon for Contact Form 7 Pro, you must first install and activate the free version of the Email Addon for Contact Form 7 plugin. After activating the free plugin, install and activate the Pro version to access all premium features.
It is always recommended to keep your WordPress, PHP, and MySQL/MariaDB versions up to date for security and performance reasons.
You can purchase the Email Addon for Contact Form 7 Pro plugin from KrishaStore. After purchasing, you will receive a .zip file containing the plugin. You can install the plugin using one of the following methods:
You can install the Email Addon for Contact Form 7 plugin just like any other WordPress plugin. You can find it in the WordPress.org plugin directory. The easiest method is to install it directly from the WordPress dashboard.
After activating the Email Addon for Contact Form 7, you can assign professional email templates to each Contact Form 7 form.
To access the email templates:
From this panel, you can choose separate pre-designed email templates for:
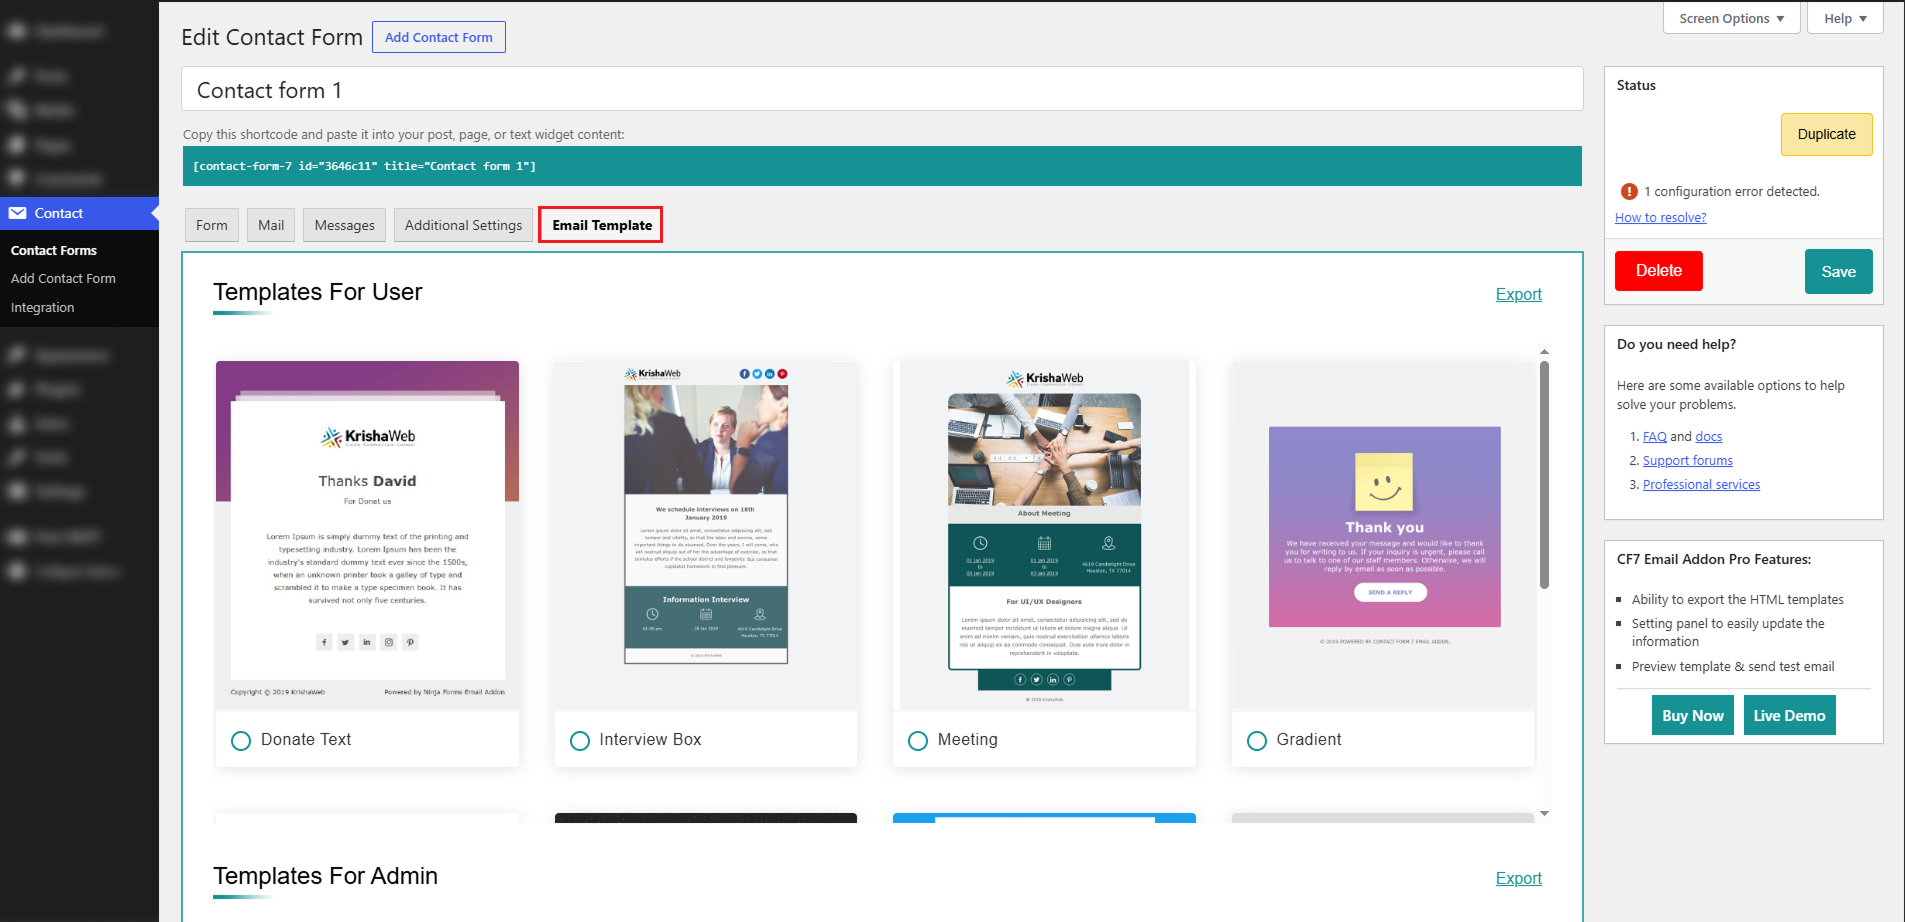
Once you select a template and save the form, the chosen design will automatically be used for future email notifications.
After creating your contact form, copy the generated shortcode and paste it into any page, post, or widget where you want the contact form to appear. For example, you can create a Contact Us page and insert the Contact Form 7 shortcode. When visitors submit the form:
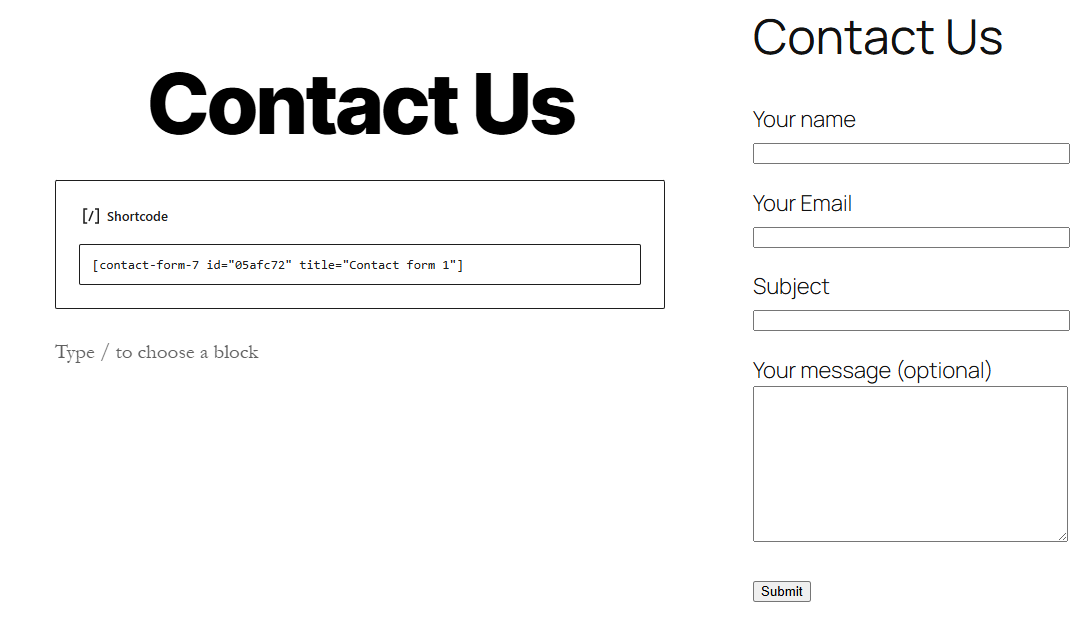
Both emails are automatically generated using the templates you have selected in the Email Template panel.
The Email Template panel allows you to manage the email design used by each Contact Form 7 form. Each form can have two different email templates:
The plugin includes a collection of ready-to-use templates. Simply select the template you prefer, then customize the email content using the standard Contact Form 7 Mail settings (such as the Message Body, subject, sender, and recipient). After saving the form, all future emails will use the selected template.
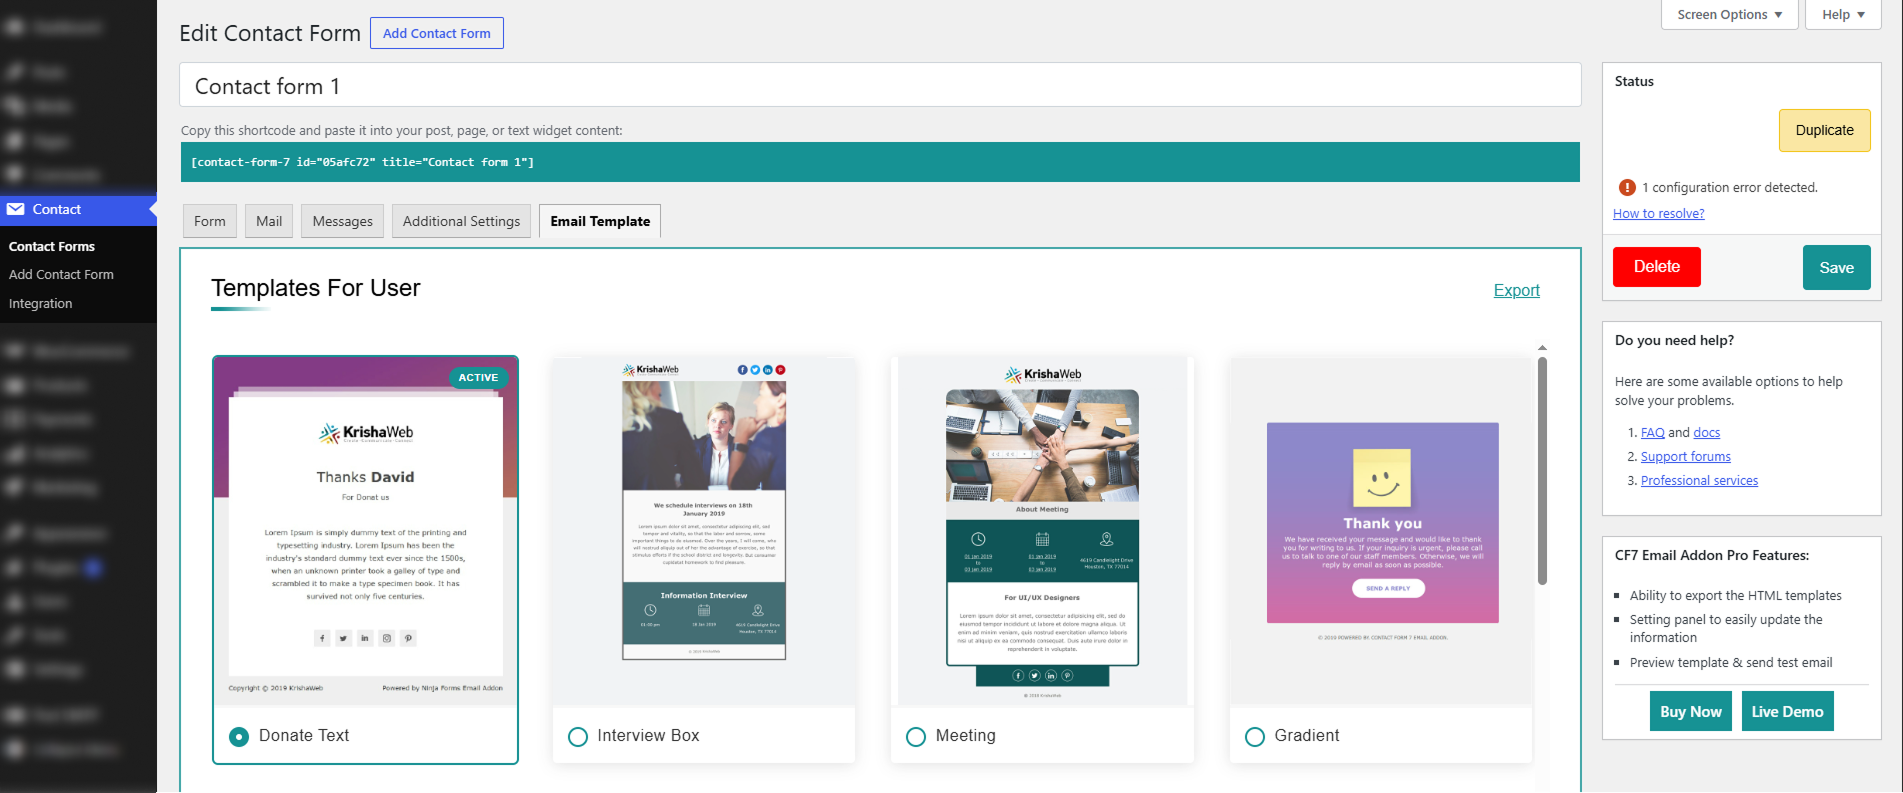
After saving, the selected template will display an Active badge in the upper-right corner of the template card, indicating that it is currently assigned to the user confirmation email.
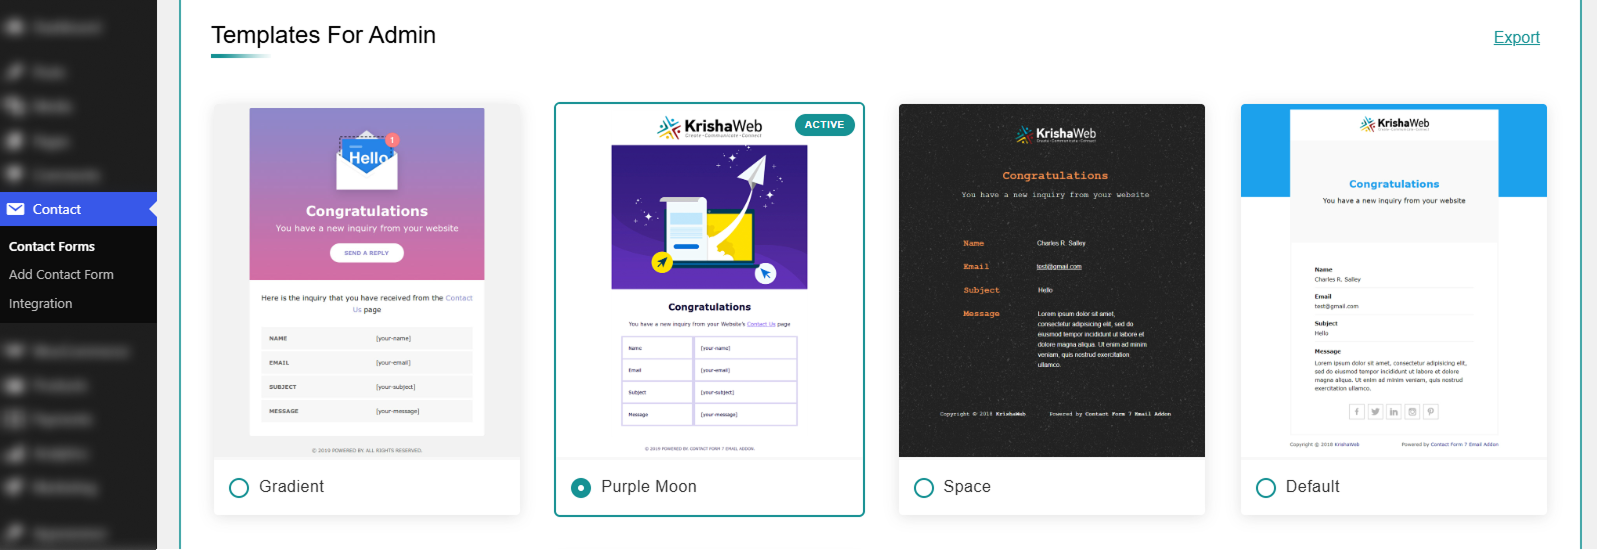
After saving, the selected admin template will display an Active badge in the upper-right corner of the template card, confirming that it is now the active notification email template for that form.
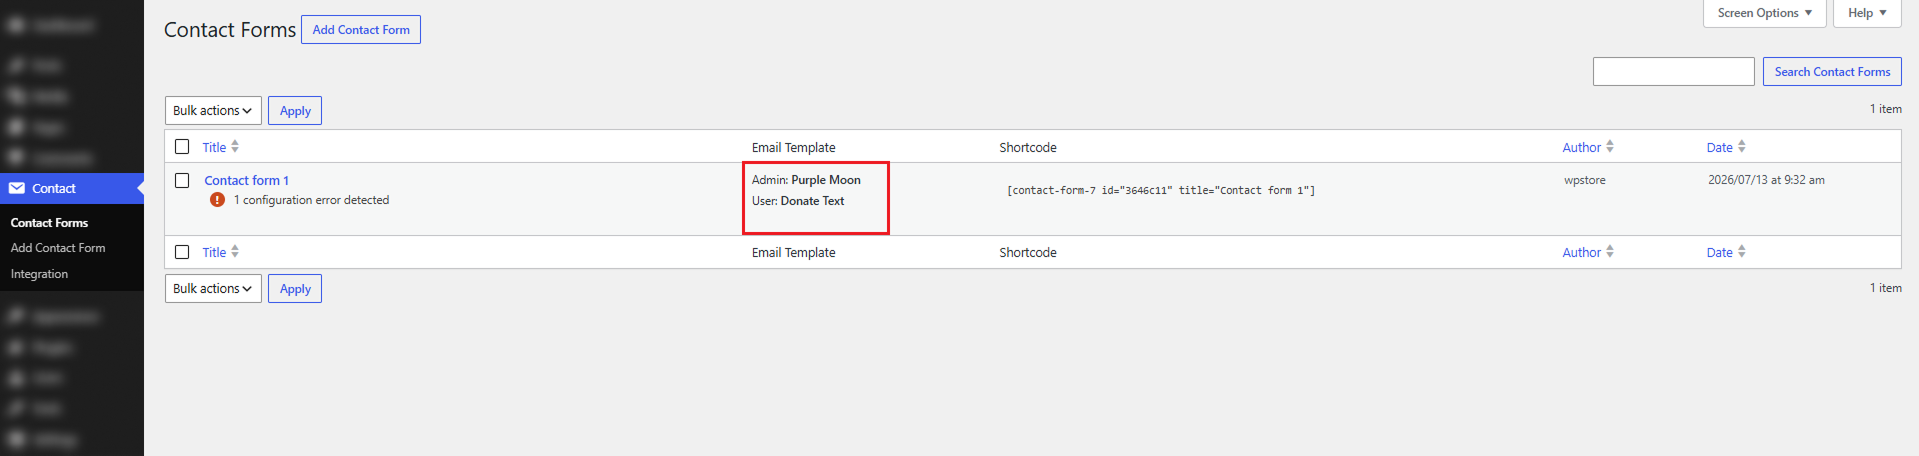
After saving your form, return to Contact → Contact Forms. The Email Template column in the Contact Forms list displays the currently selected templates for both the Admin and User emails. This allows you to quickly identify which email templates are assigned to each Contact Form without opening the form settings.
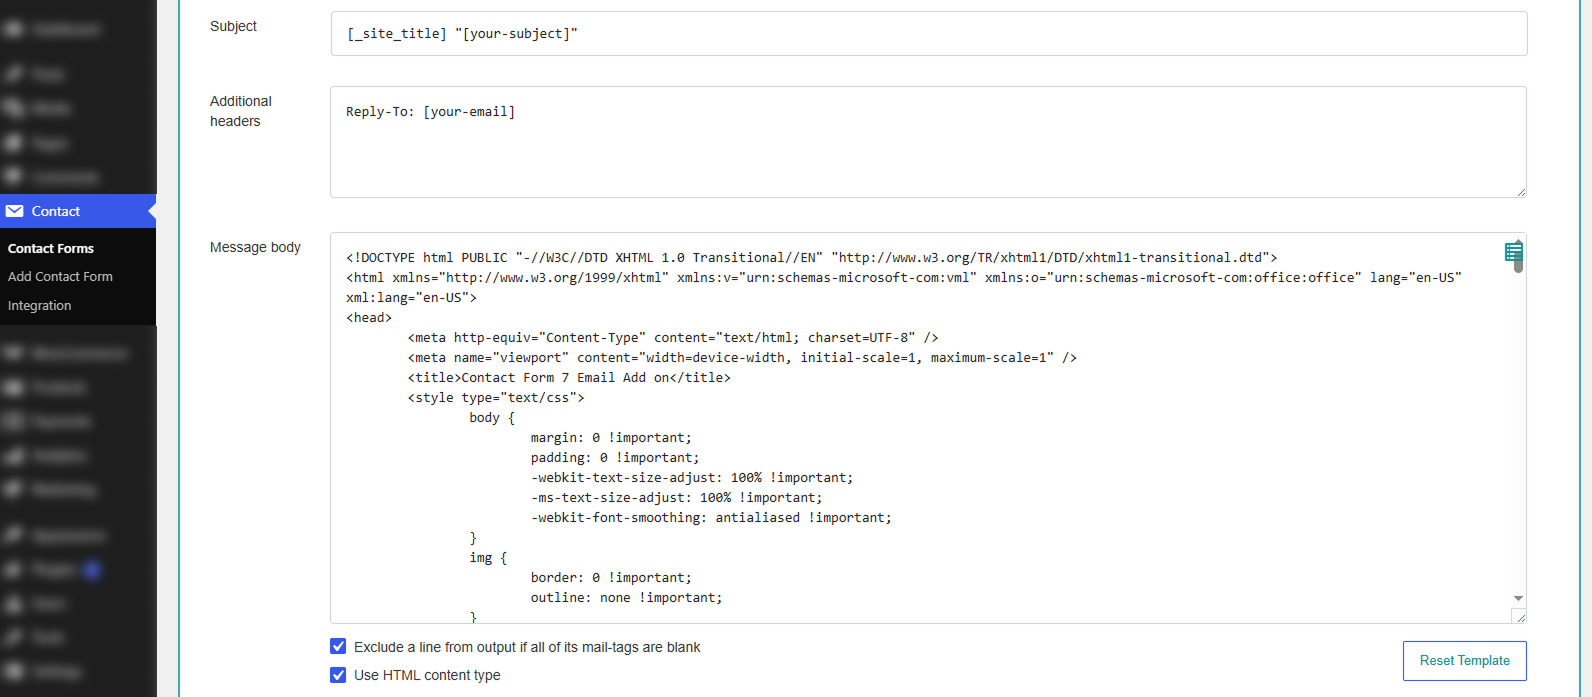
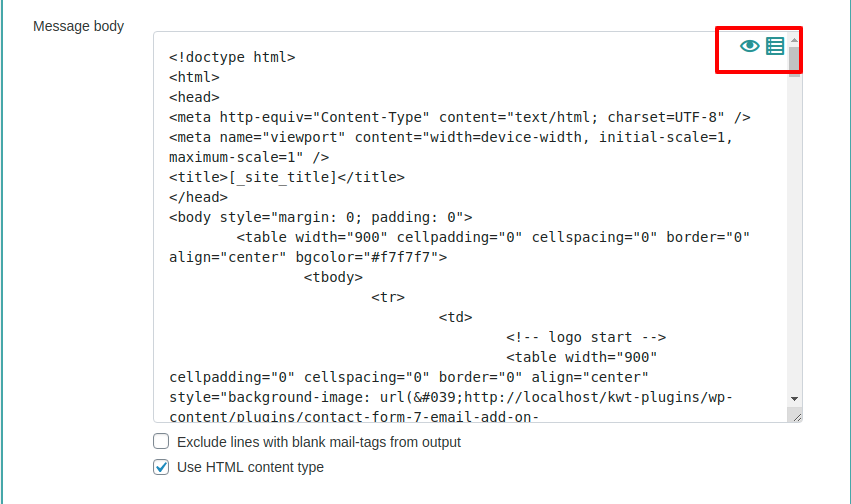
The Message Body section contains the email content that will be sent when a visitor submits your Contact Form 7 form. When you select an email template from the Email Template tab, the plugin automatically inserts the template's HTML code into this field. This HTML defines the complete layout of the email, including the header, content area, footer, styling, and other design elements.
You can edit this HTML at any time to customize the appearance and content of your email. For example, you can modify the text, change colors, update fonts, replace images, add your company logo, adjust spacing, or include additional sections to better match your website's branding. The message body also supports standard Contact Form 7 mail tags and the plugin's Special Mail Tags, allowing you to display dynamic information such as the submitter's name, email address, form fields, website details, and submission information.
Any changes you make to the Message Body will be used the next time an email is sent from the form.
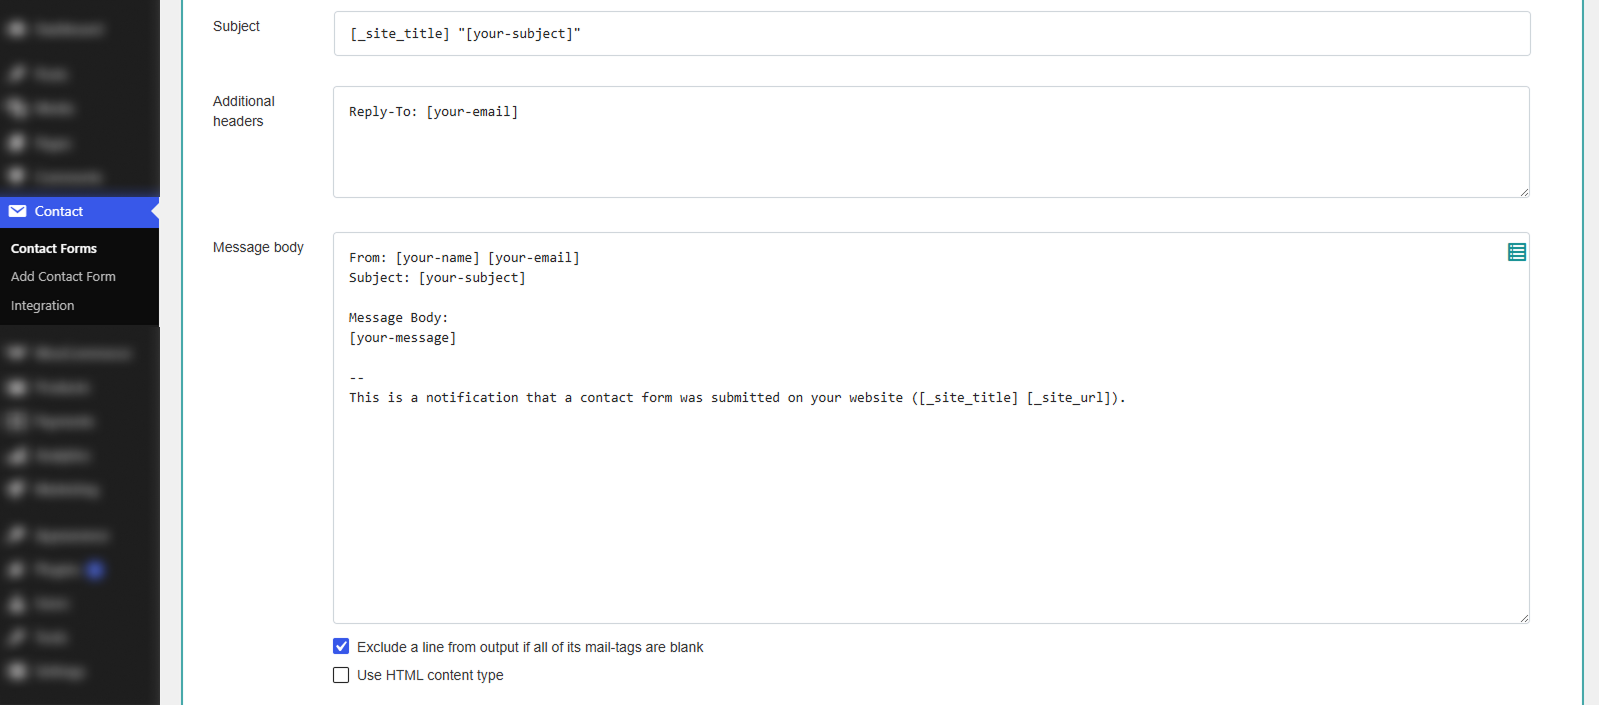
The Reset Template button allows you to restore the Message Body to the default Contact Form 7 email template. If you have modified the HTML template or want to remove the selected email design, simply click Reset Template. The plugin will remove the custom HTML template and replace it with the default plain-text email content generated by Contact Form 7. This is useful if you want to start over or return to the standard email layout without manually deleting the HTML code.
After the template has been reset, the Reset Template button is automatically hidden because the default email template is already active. If you select another email template later, the button will become available again.
The Special Mail Tags feature lets you insert additional dynamic information into your email templates that is not available through the standard Contact Form 7 mail tags.
To view the available tags:
A pop-up window will open displaying all available special mail tags. The tags are organized into three categories:
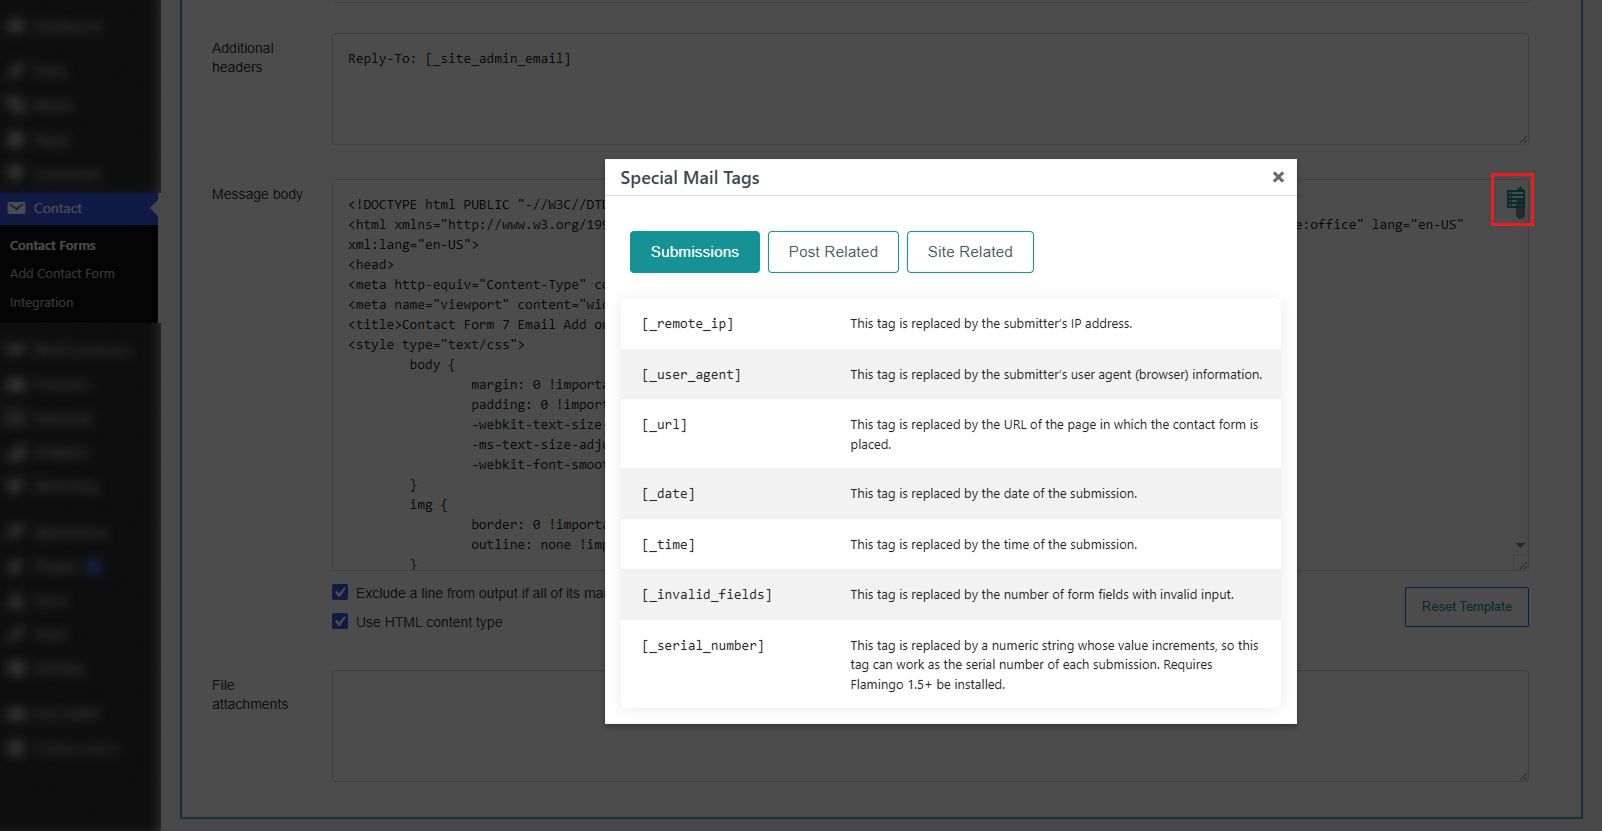
To use a tag, simply copy the desired mail tag and paste it into the Message Body wherever you want the information to appear. When the email is sent, the plugin automatically replaces each tag with its corresponding value. Using Special Mail Tags helps you create more informative, personalized, and professional email notifications without manually entering or updating the information.
You can add/remove form fields.
Ability to update content, links, graphics and buttons.
Once the admin enters a valid license key, the user can access and use all the Pro features of the Email Addon for CF7 plugin.
When you purchase the Email Addon for CF7 Pro plugin from the KrishaStore website, your license key is available in the My Account section on the front-end dashboard. This license key is required to activate Pro features within your WordPress admin panel.
The subscription remains active until the end of the current billing cycle, even if you choose to cancel it.
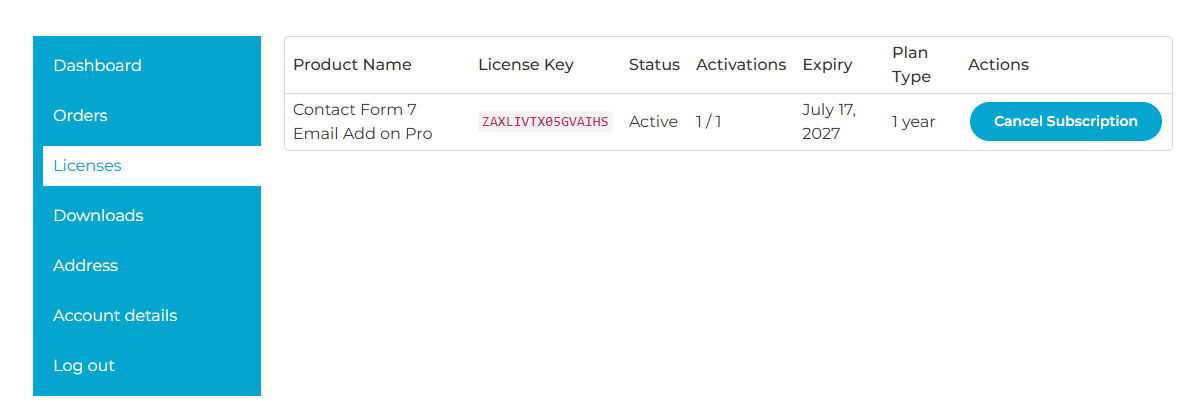
Follow these steps to activate your Email Addon for CF7 Pro license from the WordPress admin panel:
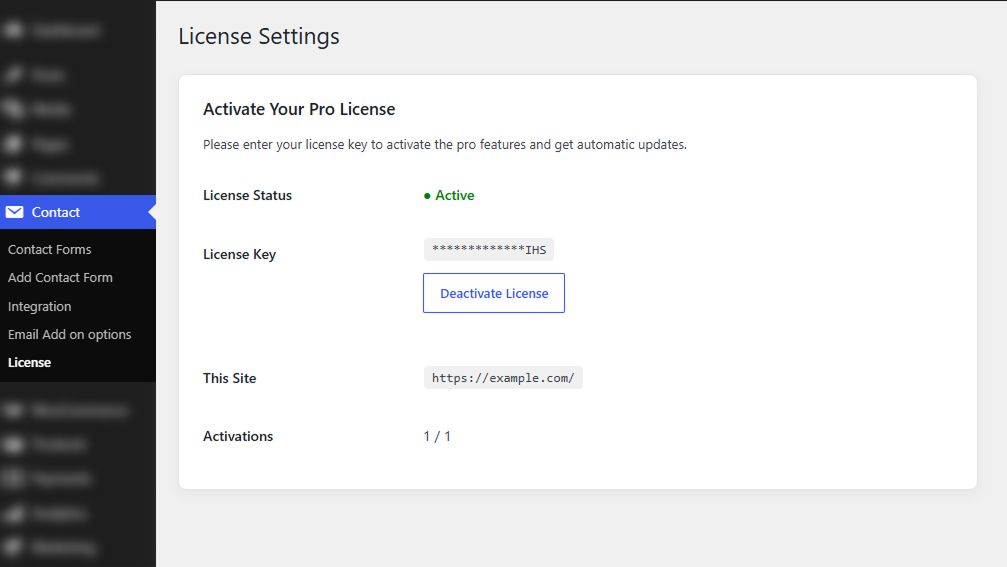
Step 1: Copy License Key
Step 2: Open License Settings in WordPress
Step 3: Enter License Key
Step 4: Verify Activation
Once activated, you will see:
Email Addon for CF7 Pro is the premium extension for Email Addon for Contact Form 7, designed to provide advanced email customization features. It includes 18+ professionally designed, fully responsive email templates that display beautifully across desktop computers, tablets, and mobile devices. Each template can be applied with a single click, allowing you to create attractive, branded email notifications without writing or editing HTML code from scratch.
In addition to the built-in templates, Email Addon for CF7 Pro includes an Export HTML Template feature. This allows you to download any selected email template as a standalone HTML file. The exported HTML can be edited in your preferred HTML editor and reused outside of Contact Form 7 in other email marketing platforms, CRM systems, or custom applications. This gives you greater flexibility when managing email designs across multiple systems while maintaining a consistent brand identity.
The Pro version also includes tools that simplify testing and reviewing your email templates before they are used in production. You can preview any email template directly from the Email Template panel to see its overall design before selecting it. After making changes to the email content in the Mail tab, where the HTML template code is stored, you can use the built-in Preview feature to review the final email layout with your modifications. You can also send a test email to verify that the design, formatting, images, and dynamic mail tags appear correctly before your contact form is published.
After installing the plugin, Pro users can manage the global email settings by going to Contact → Email Add-on Options in the WordPress dashboard. Here, you can add your logo, contact details, social media links, and other common information that will automatically appear in the selected email templates. This helps keep all user and admin emails consistent, professional, and up to date.
After entering the required information, click Save to apply the changes to your email templates.
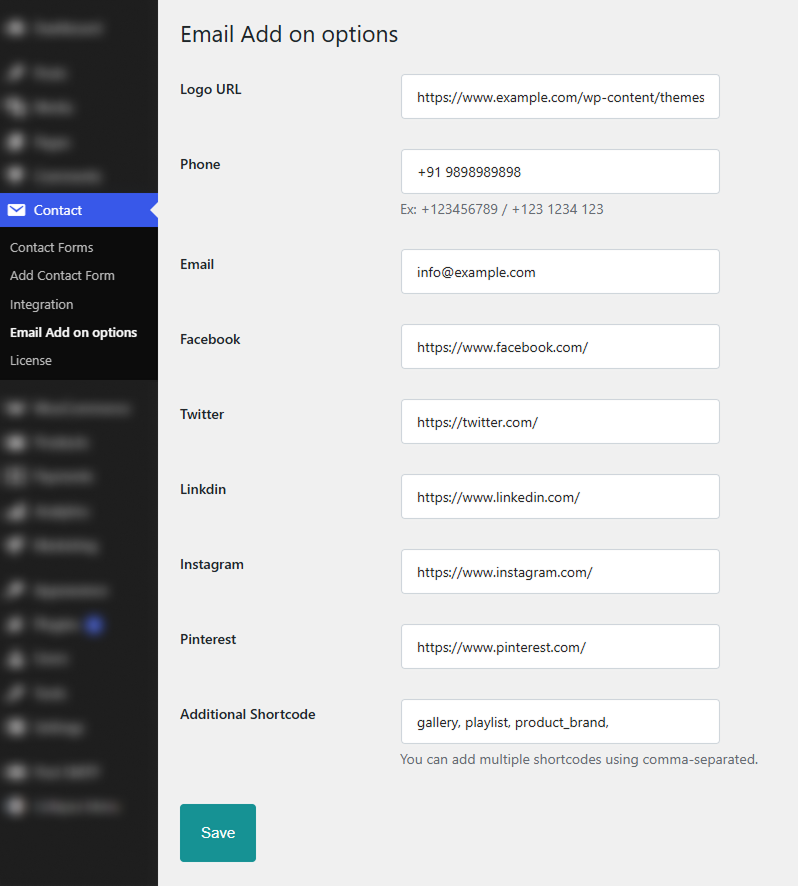
The plugin now includes support for Custom Shortcodes, making it easy to insert dynamic content generated by other plugins or your theme directly into your Contact Form 7 email templates. This feature is especially useful when you want to include additional information — such as product details, galleries, playlists, brand information, or any other supported shortcode output — in your email notifications.
A new Additional Shortcode field is available under Contact → Email Add On Options. Simply start typing in this field, and an auto-suggestion dropdown will display all supported custom shortcodes available on your website. Select one or more shortcodes from the list and click Save to register them with the plugin.
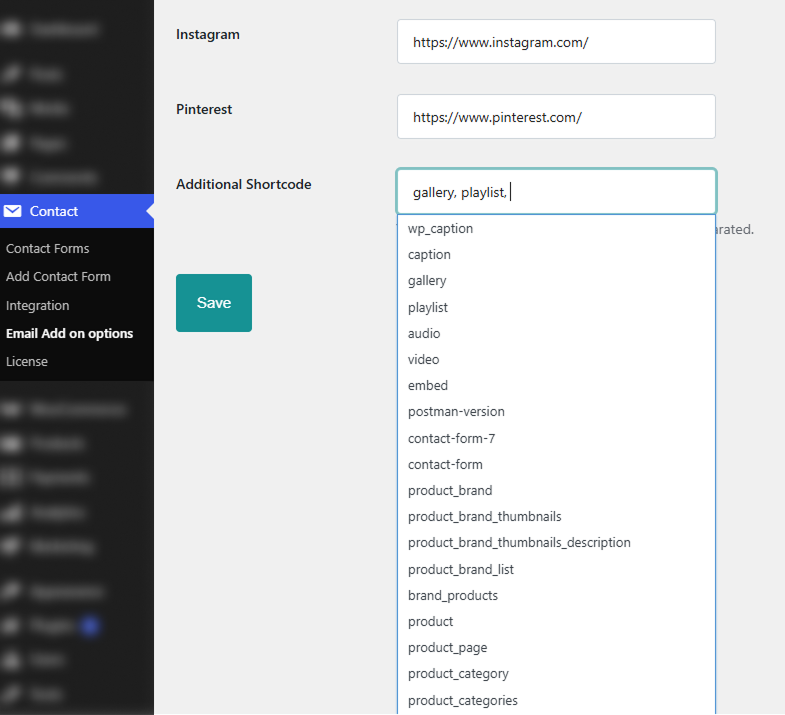
Once the settings are saved, the selected custom shortcodes are automatically converted into Contact Form 7 mail tags and become available in the Mail tab of your contact form. You can copy these mail tags and place them anywhere within your email template, just like the default Contact Form 7 mail tags (for example, [your-name] or [your-email]).
When an email is sent, the plugin replaces these mail tags with the corresponding shortcode output, allowing you to include dynamic, up-to-date content in your email notifications without any custom coding.
The Preview feature lets you see how your email will look before it is sent. You can preview a pre-built template or check your customized email after editing it in the Mail tab. You can also send a test email to verify that the layout, formatting, images, and mail tags appear correctly before your contact form goes live. There are two ways to preview your email template.
Use this option to preview a pre-built template before selecting it.
Note: This preview displays the original template only. It does not include any changes made in the Mail Body (HTML).
To preview a template:
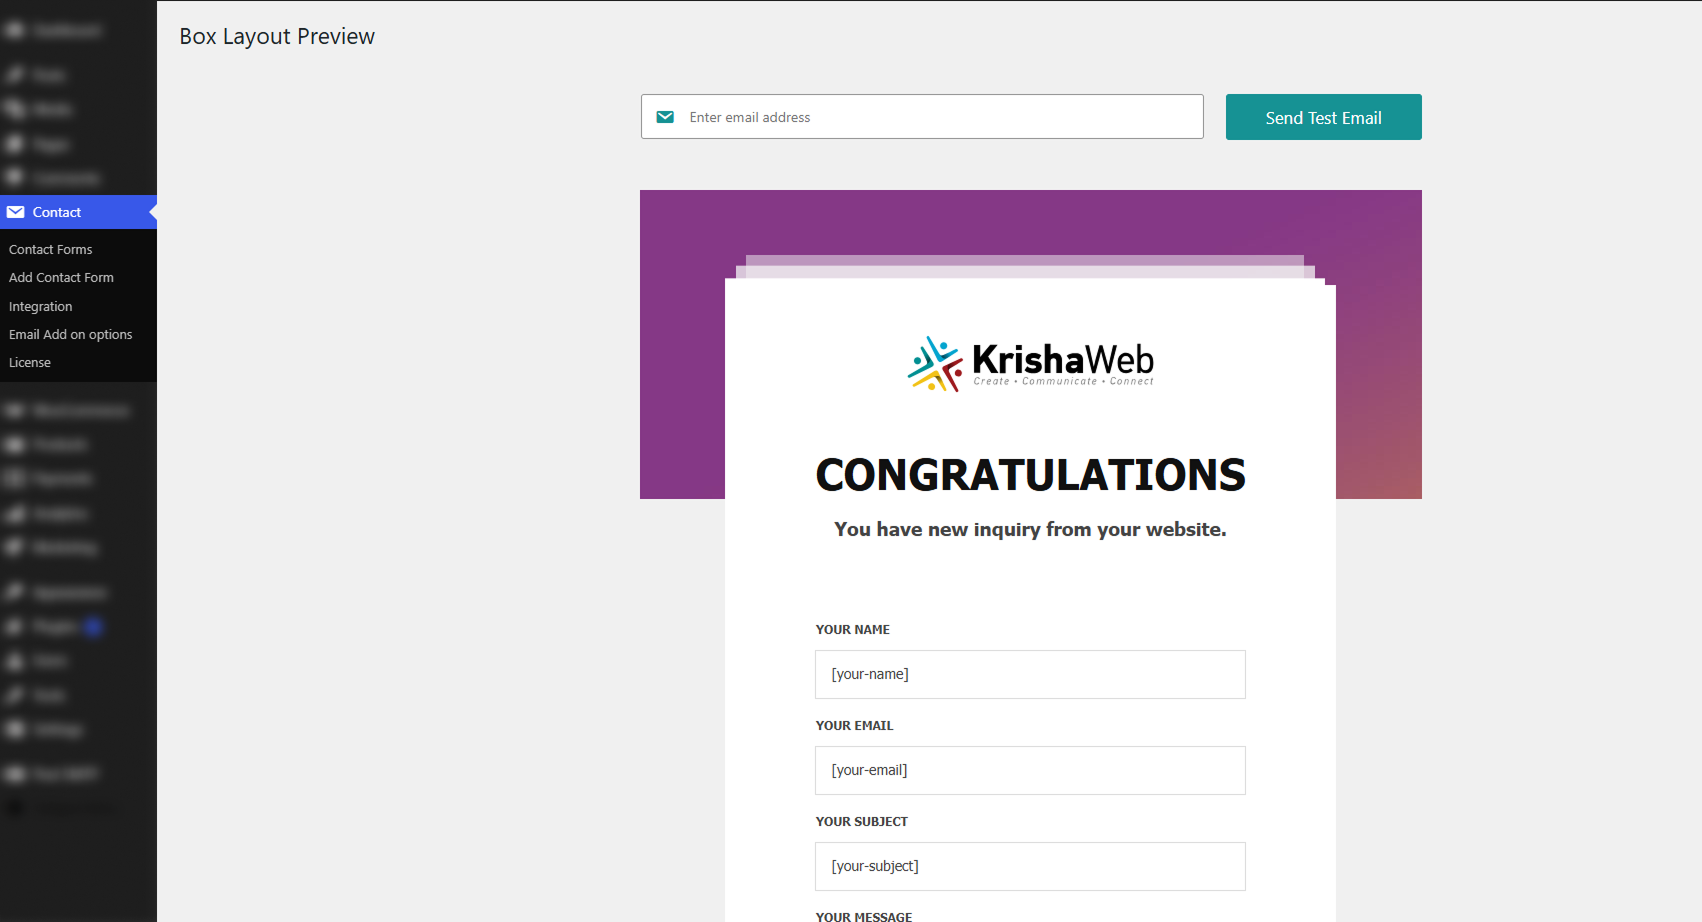
After selecting a template, you can customize its HTML in the Mail tab. Use the Preview (👁) icon in the Message Body section to preview your edited email. This preview includes all your customizations, such as updated text, colors, fonts, images, and other HTML changes.
To preview your customized email:
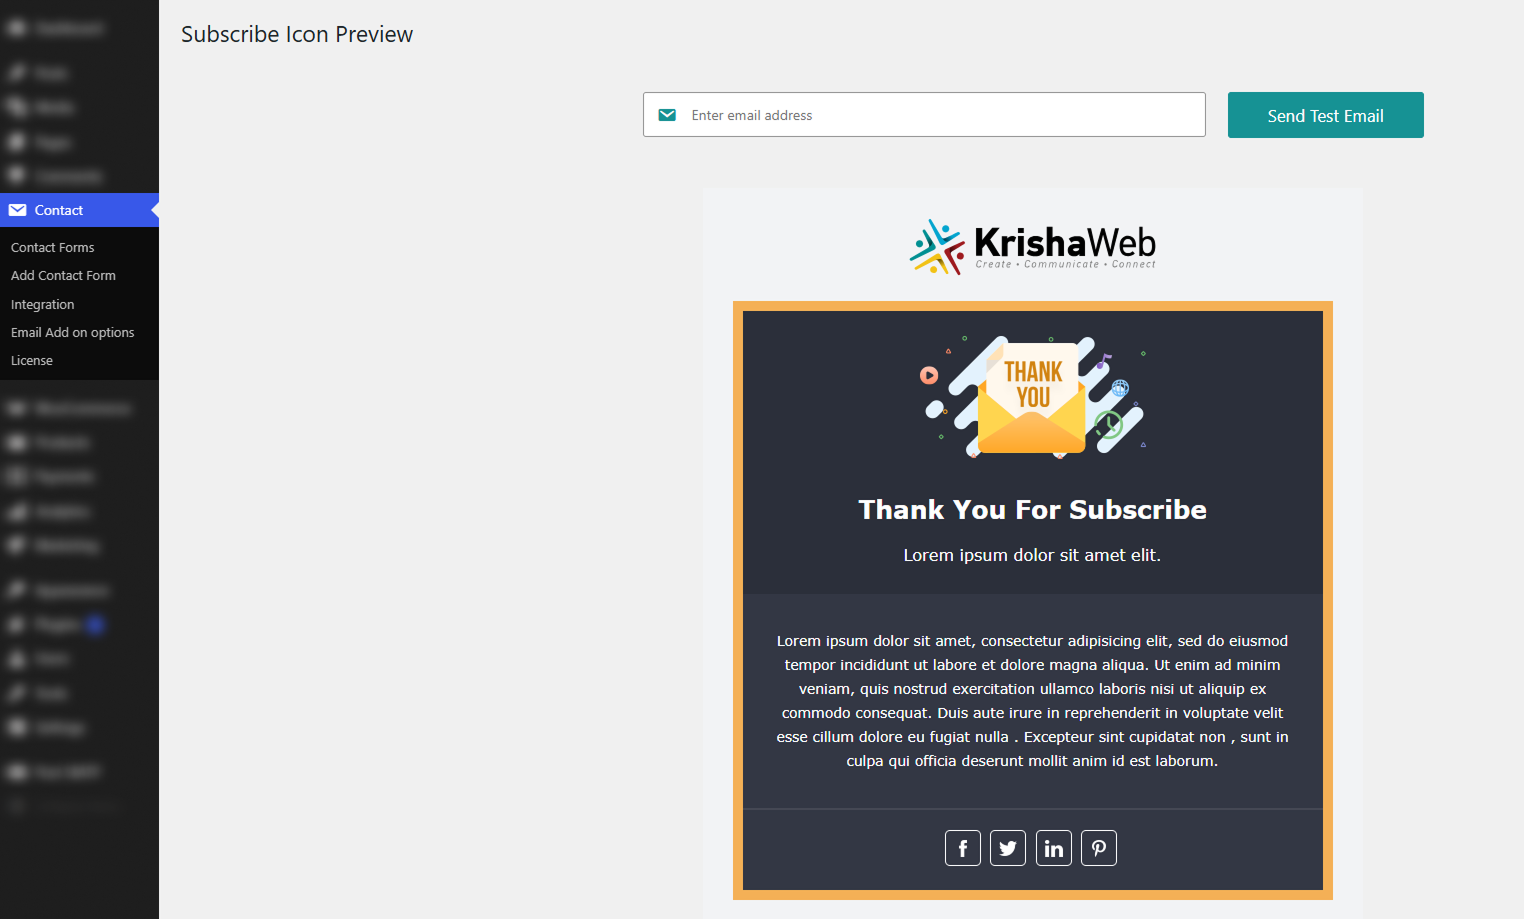
Use the Preview and Send Test Email features to review your email template and make sure everything looks correct before publishing your contact form.
The Download HTML Template feature allows you to export professionally designed email templates as standalone HTML files for use outside of Contact Form 7. This is ideal if you want to reuse the same email design across different platforms while maintaining a consistent brand identity. The exported templates are responsive, lightweight, and ready to use without requiring any additional coding.
The downloaded HTML templates are fully customizable, giving you complete control over their content, styling, colors, images, and branding. You can edit the HTML using any code editor or email template builder and integrate the templates with a wide range of third-party email services, marketing automation platforms, CRM systems, or custom applications that support HTML email templates.
To access the template library, navigate to Contact → Email Template and scroll to the bottom of the page. You will find the Template Library card. Click the Browse Templates button to open the official Email Template Library, where you can explore the complete collection of available templates.
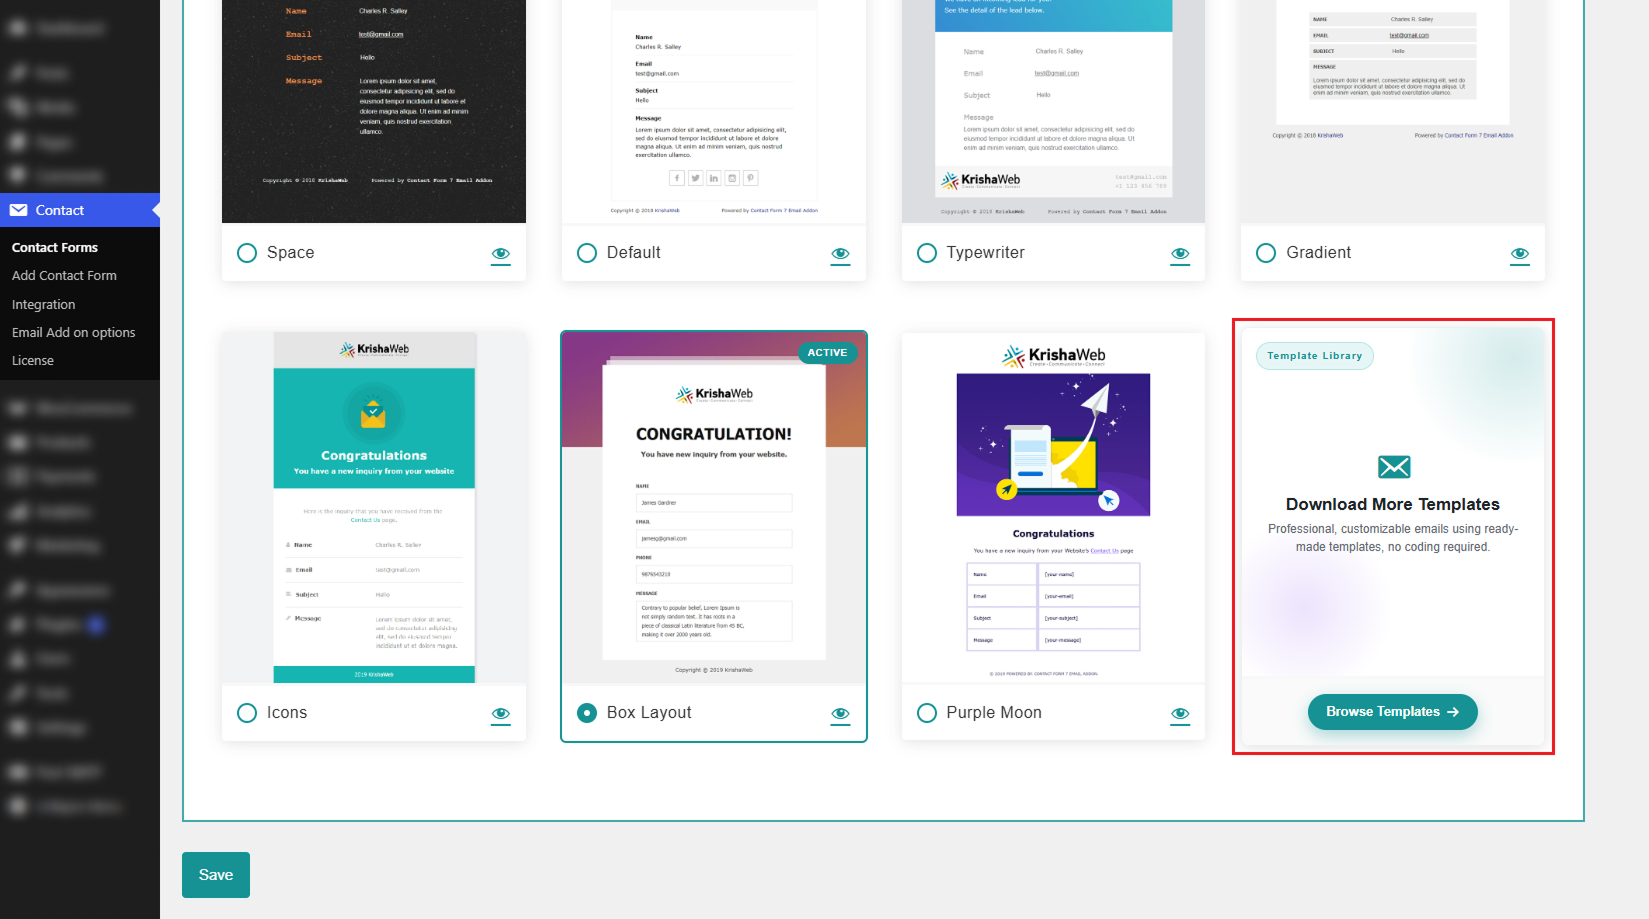
Once downloaded, you can import or copy the HTML template into the Message Body section of your Contact Form 7 email template. When a visitor submits your Contact Form 7 form, the email will be sent using the selected HTML template, providing recipients with a professionally designed and visually appealing email while preserving all Contact Form 7 mail tag functionality.
You can check the details in this Github repo link. It has plugin as well as theme demo, how you can add new email template using plugin or theme.
Do you have any questions? Email us at [email protected] for personal assistance.